December 2016 – Winter Party
[gallery size="medium" best casino canada ids="6654,6655,6656,6684,6657,6658,6659,6661,6662,6663,6660,6664,6665,6666,6667,6668,6669,6670,6671,6672,6673,6674,6675,6676,6685,6677,6678,6679,6680,6682,6683,6686"]

Future Events
March 26, 9 am – 12 pm
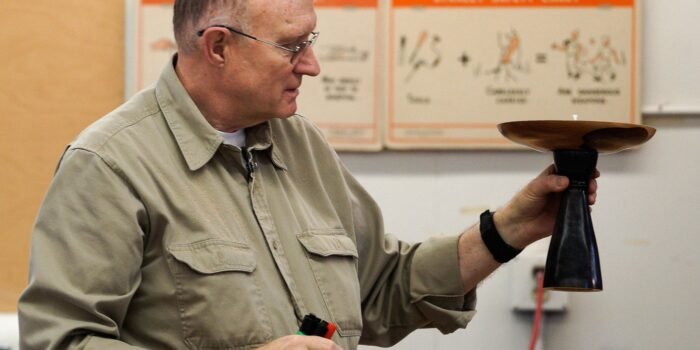
Photographing Your Woodturnings – Art Waldinger
at Cabrillo Middle School
President’s Message
We had a great meeting in January with approximately 45 showing up, and we signed up four new members. Welcome Mimi and Phil Allin, Tim Burrett, and Cindy Zanotti.
We also had over twenty “show-and-tell” presentations, ranging from some good works by beginners to beautiful and creative artistry by some of our most advanced members. Click herefor pictures of the meeting.
The energy and enthusiasm in the room was very enjoyable to me; I was especially pleased with those who in some fashion participated in the rather spontaneous and varied dialogue.
The luncheon was great we had approximately 18 attendees at Mimi’s in Ventura, and there the diversity of conversations continued. Some talked about woodturning specifics, other about life events, and others just listened to the excellent exchange. We’ll do it again after next meeting scheduled for Saturday, February 26 at Cabrillo Middle School in Ventura.
During the coming meeting we won’t have a raffle or a normal “show-and-tell”, but instead, Sam Turner will demonstrate how to turn a letter opener on multiple axes. In addition, we’ll have our CIW Mini Gallery, when we attendees will select one piece to represent CIW at the upcoming AAW 25th Anniversary Symposium next June 24-26 in Minneapolis-St. Paul.
I encourage everyone in our membership to bring his/her best work. The selected item will be shipped to the Symposium, and the club will pay the entry and shipping costs. (Note that the item must be for sale.) So if you have something on a shelf, bring it. If you have something in mind, get turning. Click on this link to learn more about the entry rules.
Pedro
| Mentors Available
The following list of members have offered to act as mentors to any member of the club who wishes to have hands-on instruction. This can be done at the mentor’s shop or at the member’s home on their own lathe. It is an excellent way for beginning turners to quickly learn basic skills and safety and for more advanced turners to develop new ideas and skills. Using your member roster, give any mentor a call to arrange a time. If you don’t have your roster or want to add your name to the mentor list, give the newsletter editor a call. Each mentor can teach basic skills; some have also listed specific topics in which they are especially interested or have more advanced skills. Bruce Berger Any topic including segmented turning Warren Brown Any topic David Frank Any topic Al Geller Open form bowls, natural edge bowls, bowl design Ron Lindsay Any topic including hollow turning freehand Jim Rinde Anything to do with using and turning resins, turning goblets, hollow turning with a boring bar with/without a laser Herm Ross Miniatures; tool making and metal work Chuck Stevenson Basic turning; he is learning to do segmental work Gary Toro Anything you want to make Sam Turner Any topic (if he doesn’t know how, he will learn it with you) |
Turning(s) of the Month
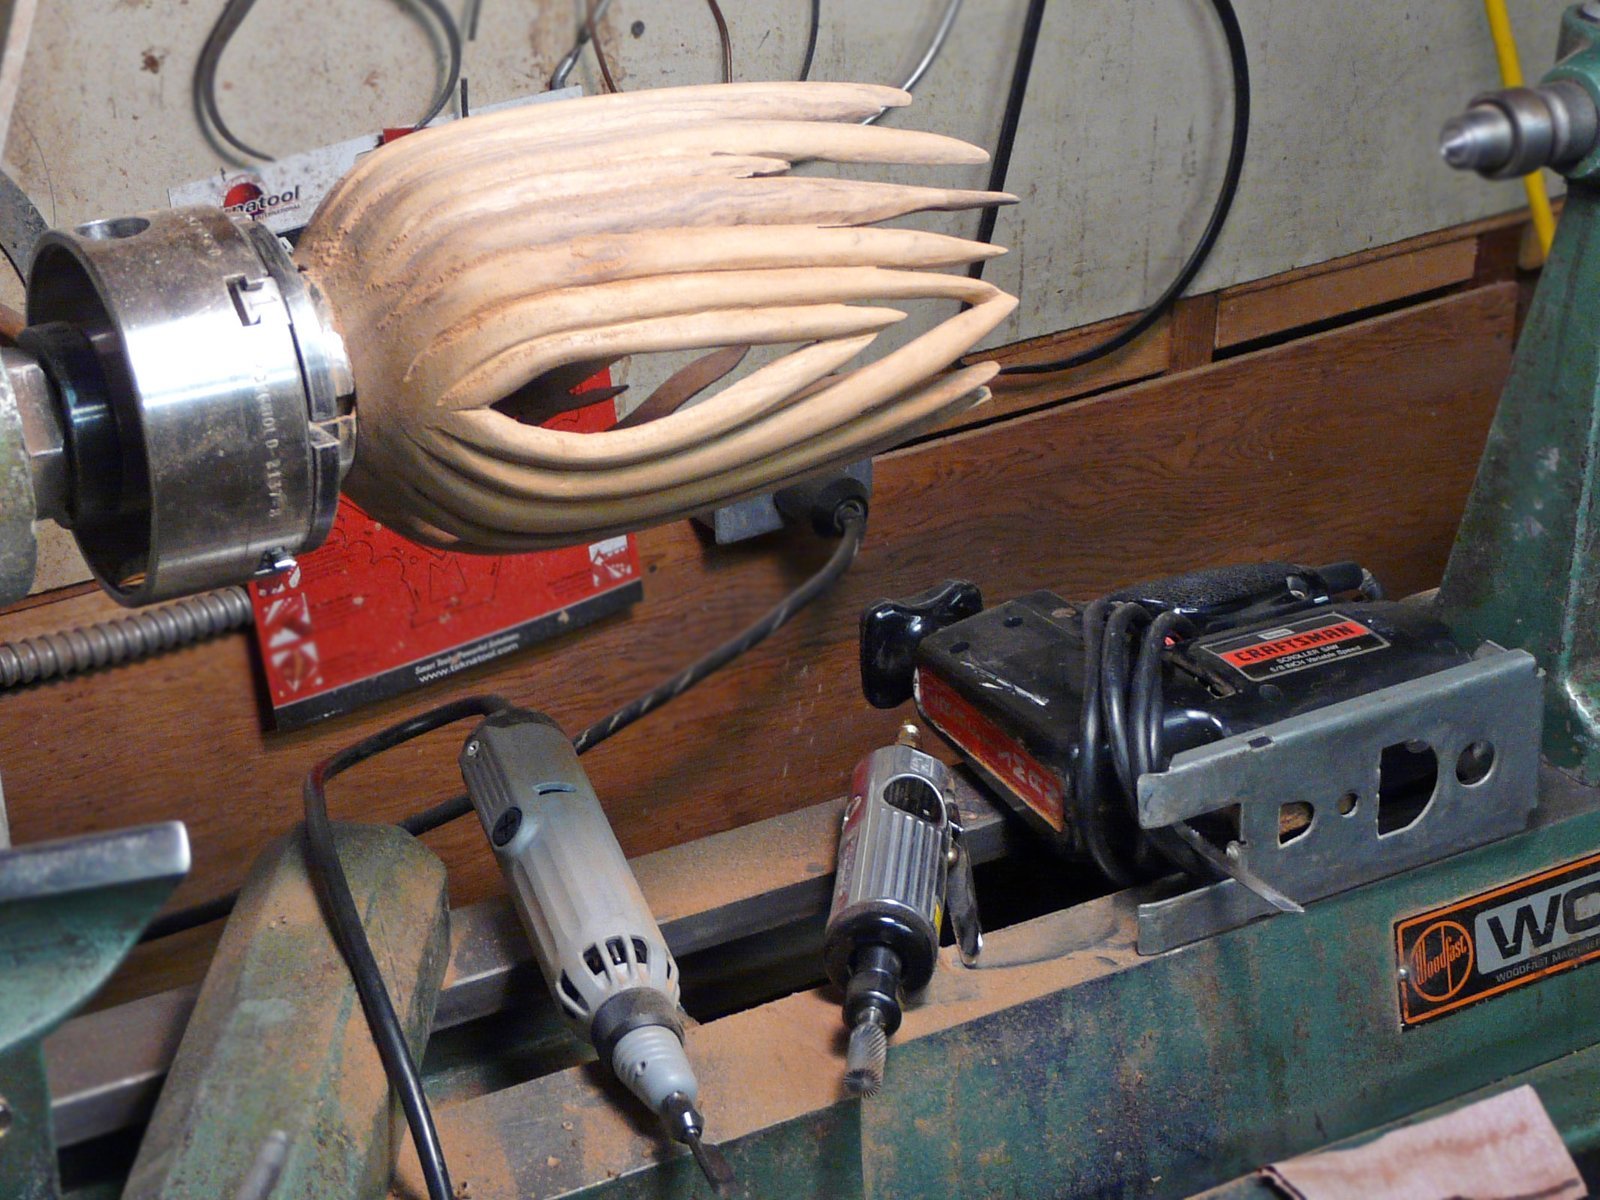
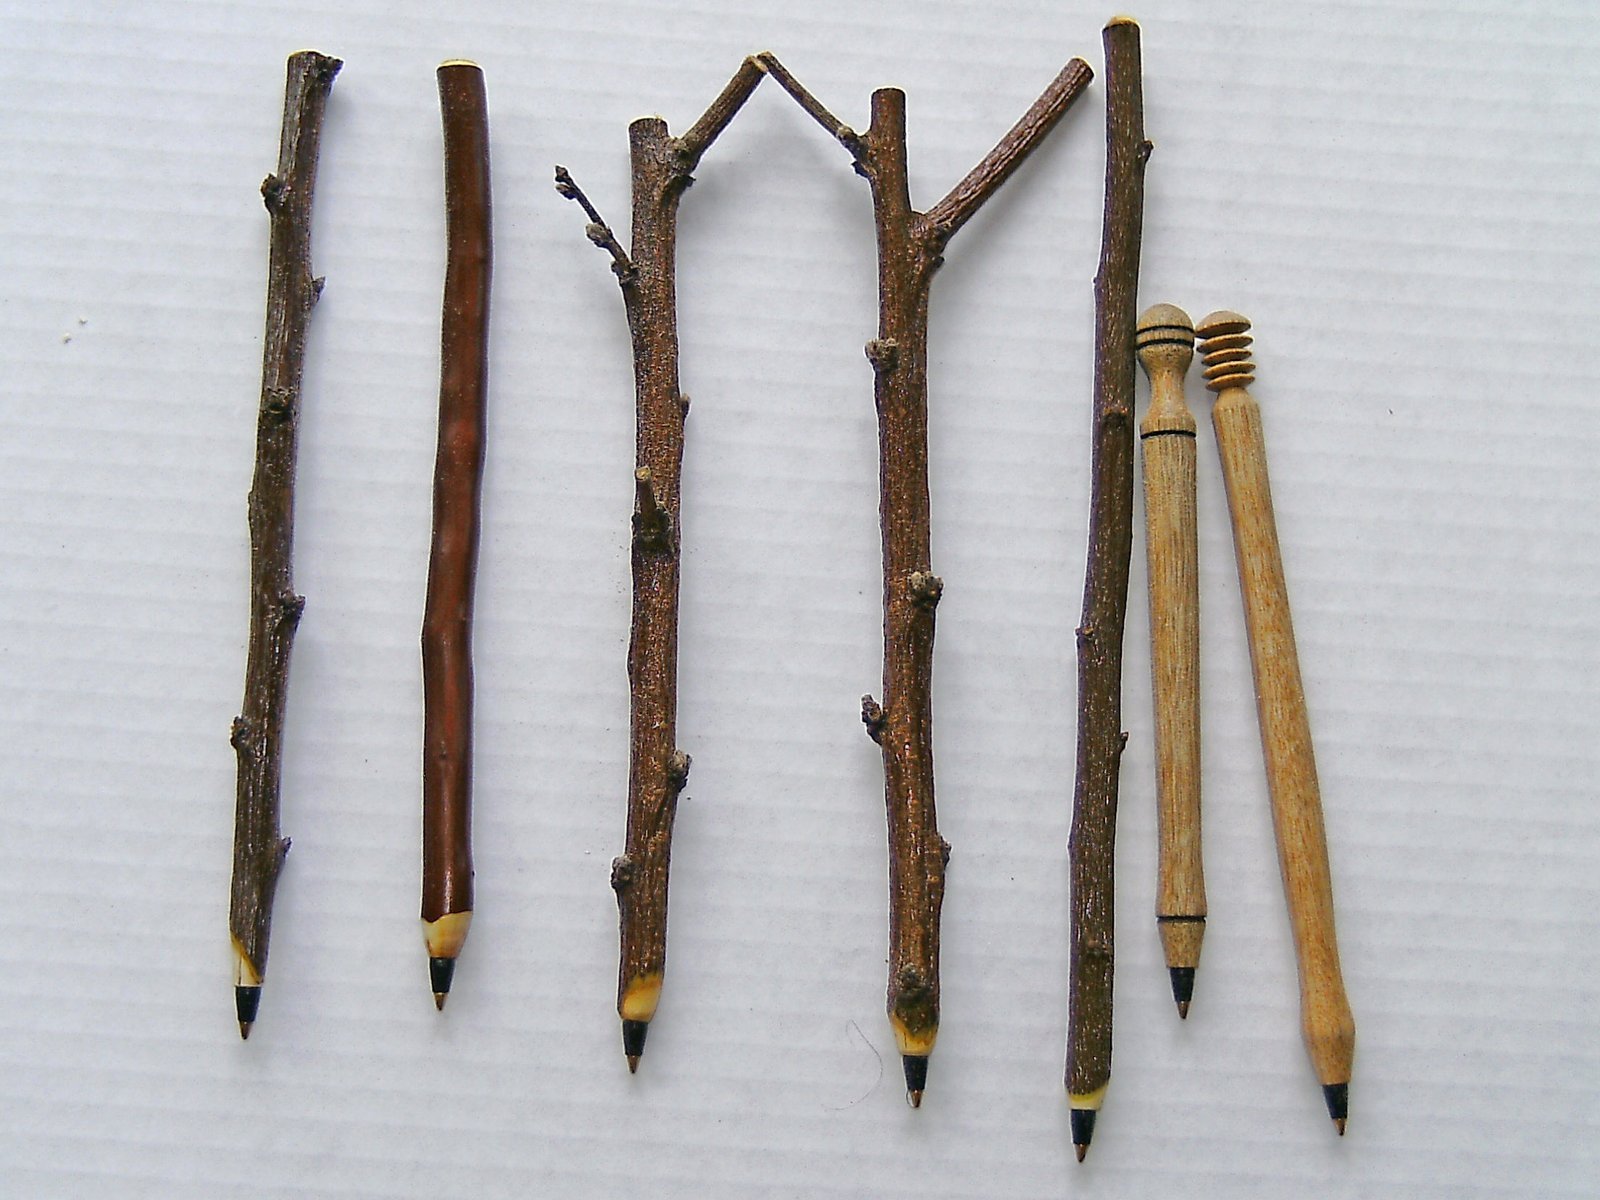
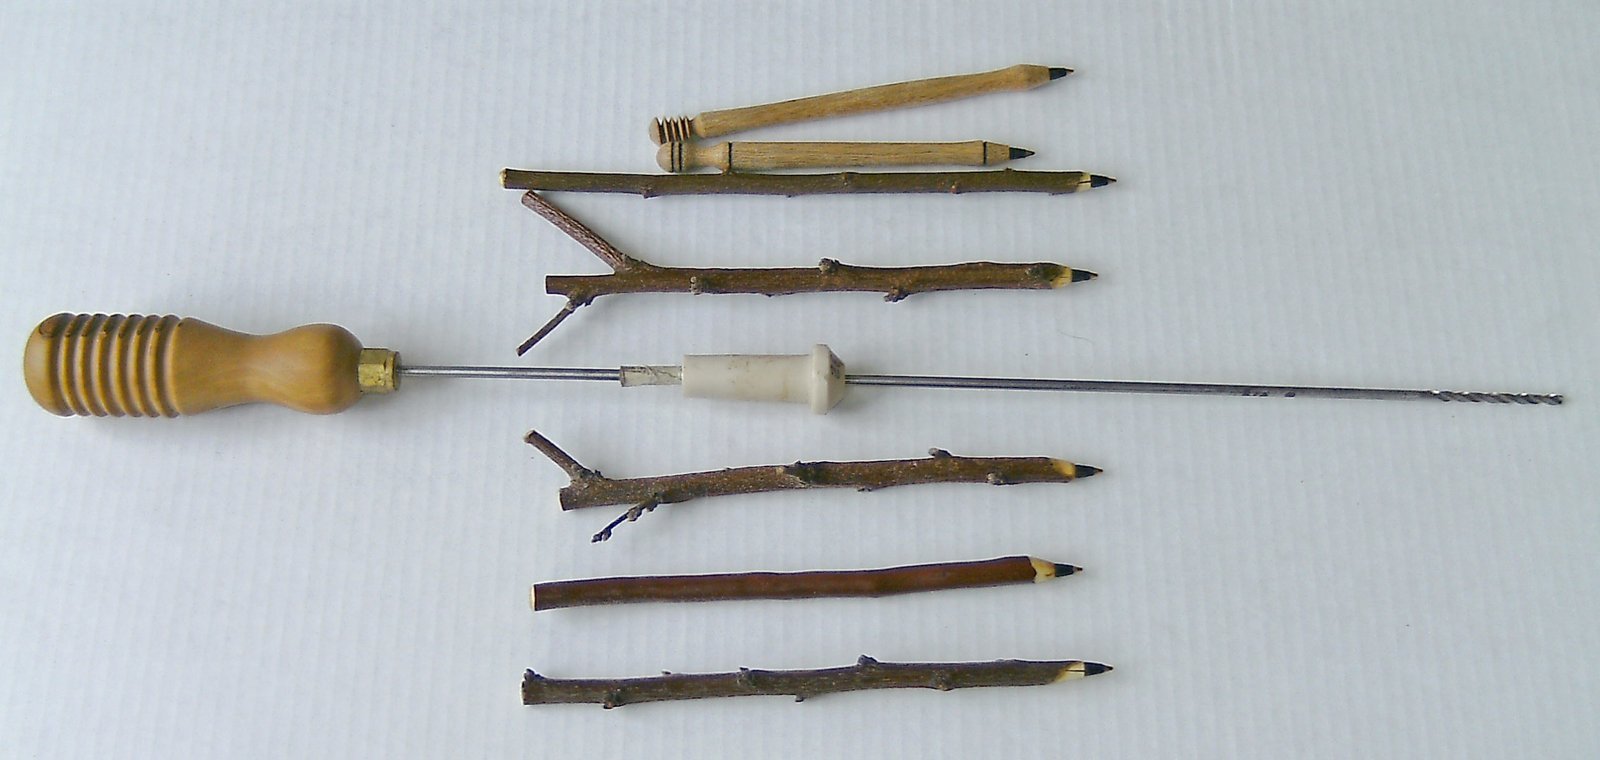
Six pieces from the January Show-n-Tell are featured this month. The “Twiggy Pen” – Dave Staeheli The Twiggy Pen is a variation of the “Bic Stick Pen” using natural twigs instead of dimensional wood. The main difference in construction is that you use “tailstock” drilling instead of using a drill chuck or a drill press. As there are no dead centers marketed with a Morse taper designed to accommodate a 5/32” drill bit, you must construct your own. For the non-metal worker, a piece of Corian works best. I hold a piece of ¾” to 1” x 3” – 4” square stock of Corian in the jaws of a lathe chuck, drill a 5/32” hole through it, counter sink a taper (to help the drill bit find the hole after passing through the tailstock) and then turn a Morse taper on the outside. The Morse taper doesn’t have to be very long, maybe 2” or less, nor does it have to be perfect. As long as it fits at two “high points” and registers the same every time, it will work fine. I usually use calipers to rough the Morse taper close, then bring up the empty Morse taper tail stock onto my taper, hand turn the piece to rub the high points, pull back the tail stock and then turn away the high points. After constructing the Morse taper, reverse the piece and insert the dead center into the headstock Morse taper and turn a small cup into the end. This will be to hold and center the twig as you drill the twig out. You will also need a 18” x 5/32” “aircraft” drill bit. I purchase mine at www.Buydrillbits.com . You may attach a dedicated handle to the drill bit, or hold it by other means. Now the hard part. Find a perfect twig. Since this is impossible, find a twig that is as straight as possible, at least 6” long but preferably a little longer, and at least 5/16” in diameter at the small end. Interesting bark is a plus. Little side branches can be left on but do present interesting chucking problems. Recommend the twig be dry and free of cracks. Now drill. You need to turn a small taper on the twig before drilling. Chuck the twig up at the small end with spigot jaws on your scroll chuck. Bring up the tailstock and center the twig on a live center with only light pressure. Turn a small taper leaving an approximately ¼” wide flat spot on the end of the twig (tailstock end). I use a small skew. Swap out the live center for the Corian dead center. Have the quill on the tailstock backed off to zero and bring up the tailstock onto the twig. Turn the lathe on and observe how much solid wood it presents versus how much “ghost”. There should appear at least ¼” of solid wood where you will be drilling through. Insert the drill bit through the tailstock and dead center to start drilling. Drill only in small increments, pausing frequently to clear the shavings off the drill bit. Drill 4 ¾” into the twig. I use a piece of masking tape on the drill shaft and when it comes up even with the handle end of the tailstock, I have drilled enough. Usually many twigs are drilled through the side netting only a smaller number of successes. Live with it. Now either part off or saw off the twig at the chuck jaws. I usually clean up the ends by sanding, leaving a small flat point at the pen end for the shoulder of the pen insert. Spray the twig down with a clear type finish like polyurethane or lacquer. I recommend buying “Bic” style pens by the box as once you have made one pen, you will want to make many more. Remove the pen insert from the pen by inserting a knife blade between the insert and the pen body and pushing sideways. Place the pen insert into the twig and you are done. When things go well, total time for a completed pen, less than five minutes. Fluted Carob Bowl – Michael Ingham After turning the exterior shape, I used a platform fitted to that shape inserted into the banjo to support a router mounted to a sled. I used a ¾” cove bit. This process was demonstrated by Bruce Berger for our club (see Mini-Demos Nov 2008 on the club website). Using the indexing feature on my lathe, I cut equidistant flutes. Be sure to keep downward pressure on the router sled, and move it only from left to right. A climb cut – from right to left – tends to throw the router out of the groove. I used a
microplane (Shureform tool) to shape the sharp edges of the flutes, making convex surfaces to meld with the concave surfaces of the flutes. Using very coarse sandpaper, I refined the shape, then smoothed with finer grits. I then hollowed using the Paul Crabtree tool (seehttp://www.spswt.org/NL/march08.pdf ). The finish is epoxy a la Jim Rinde. Wood-burned and Colored Hollow Form – Gary Toro This vessel is made with Ficus salvaged from trees cut down behind Ventura College. I first rough turned it and set it aside to dry. Once dry I finish turned it and laid out the design using an indexing wheel at 60 divisions. The design is laid out using a compass and the indexing wheel. I then burned the lines using a small skew tip on my wood burner. I then used a U-shaped tip to texture and burn the black portion of the vessel. The colors used were Kooh-I-Noor vibrant ink available atwww.dickblick.com. “Exotic Scraps” – Bruce Berger
Bleached Redwood – Jim Rinde I tried bleaching Redwood with household chlorine bleach and found that it worked to some degree by bleaching the soft summer wood, but not the denser winter wood. This was the result after the wood was in the bleach for about an hour. The wood was in the form of a small end grain bowl turned to about 2 mm in thickness.
Not satisfied with the results, I decided to heat the bleach and see if it would bleach the winter wood if the temperature was higher. I put the plastic container containing the bowl, some rocks and bleach in the microwave and heated it to about 50 deg. C [122 F]. I then put it out in the sun and covered the container with a glass plate. After about two hours, I checked the progress and was very surprised to find the wood bubbling. Yes, the wood was reacting with the bleach and was being eaten away by it. I immediately removed the bowl and placed it in cold water to stop the reaction. After washing it several times, the surface was very slippery/slimy. I soaked it in baking soda/water to neutralize any acid and dried it. The wood had been etched and had lost over 30% weight. The thickness decreased from 2 mm to paper-thin in some places (summer wood). I Checked Wikipedia under bleaching wood and found a reference to the fact that bleach will attack cellulose if the pH is neutral. Acacia “Flame” Vessel – Ron Lindsay First, a tulip shaped vase was turned and hollowed to 3/8” thickness. This was turned dry and was quite a chore because of the hardness – Acacia is quite dense, tough, and hard – and further complicated by the long reach (9”) to the inside bottom and working the end grain. The Rolly Munro hollowing tool http://www.rollymunro.co.nz/tools.html made the job barely tolerable. If you know your design for piercing in advance, you can drill a series of holes down the side to easily gauge wall thickness. A tenon was left on the base for holding in the 4-jaw scroll chuck while carving later. This wood was quite dry when turned so did not need much drying before carving. I laid out the flame design aligning with the wood’s figure using a green grease pencil. This is easily erased with rubbing and paint thinner to adjust the design. Mount the vessel in a scroll chuck and use the indexing pin to lock the headstock in convenient positions for carving. A plug can be made for the top rim while still round for extra support from the tail stock during the rough carving. I used a 3/8” drill to make starter holes for my sabre saw. The saw turned out to be extremely useful for cutting this very hard wood. I expected to use the V-shaped tool of my power carver or hand chisel, but this hard wood was easier to work using the saw (on the lathe), an air-powered die grinder with a straight bit (with the vessel held in my lap), and long coarse sandpaper strips (back on the lathe). It was convenient to be able to get my hand inside the vessel in order to sand the inside surface. Once the design is carved and sanded fine, turn off the tenon and turn the vessel bottom. I used a jam chuck that reached all the way to the inside bottom of the vessel and a live cup center in the tail stock to hold it. The vessel was finished with several treatments of Danish oil. ▲▲▲
|
Questions and Answers (Q&A)
This is a regular feature of the monthly Newsletter. Send your questions to the newsletter editor, Ron Lindsay,RonaldBLindsay@verizon.net . He will forward each question to our panel of experts. We will get answers to each question from at least two of our experts and publish them in a future newsletter in this Q&A section. Q: Where can I look to find a good used lathe (other than Craig’s list and The Recycler)? What are some good names, and which ones should I stay away from? A: (Gary Toro ) I have a Nova DVR lathe that I am very happy with. Finding a good used lathe may be tough, however they do come up occasionally. You might consider a mini lathe until a good used one shows up. A: (Al Geller) I don’t have much experience with different types of lathes but I do recommend the Oneway and the Powermatic. I have heard that the General lathe from Canada is also quite good. I would look in the ads from Fine Woodworking and also Woodworker West magazine. Both magazines have individual ads containing used lathes. One source for used equipment is schools such as the one from Craft Supply USA, which sells their school lathes every year or so. A: (Anon.) To this woodturner the decisions involved in buying a lathe are matters related to personal preferences, affordability and circumstances. If the wood turner likes top-of-the-line tools and has the financial ability, there are several lathes in the market from which to choose, their cost is approximately the same, around $6,000. The popular names in alphabetical order are: Oneway, Robust, Stubby, Serious and Vicmarc. For the woodturner who is happy with functionality and is willing to work around some minor deficiencies, considered as niceties by others, there are several brand and models ranging from $3,000 to $5,000. The names that come to mind are: Jet, Nova and Powermatic. If the wood turner prefers to turn small objects only, there are also several choices ranging from $500 to $2,000. The names that come to mind are: Craftsman, Jet and Turncrafter, but there are many others. I consider myself an occasional, beginner to intermediate turner who likes to experiment with all sorts of projects. I would guess I turn 4-6 hours a week. My shop is limited to the size of a one-car garage, and I have a number of other tools that share the space with the woodturning equipment. During the last three years, I have purchased three lathes. The first one was a Nova, that after awhile became too small for some jobs, and its lack of electronic speed control drove me nuts, so I sold it on Craigslist. The second was a Jet 1442 EVS; this is a very good machine that offers a lot for its cost. My only objection was the lack of ruggedness of the ways and the relatively narrow legs. I felt the machine vibrated too much for my taste. My current lathe is an older (2003) Vicmarc that I bought cheap, but have spent a considerable amount of money and time bringing it up to my satisfaction. This is a heavily built machine, reasonably well designed; so far I’m happy with it. What is a good lathe?. The most you can afford to spend for your woodturning desires and the space you have available. I invite you to borrow the Club’s lathe to get started and visit with some of the Club’s mentors to pick their brains. Where to buy it? Any of the online services, other club members, write to other clubs in the area and symposiums, or some of the local outlets. A: (Joel Oksner) I would suggest contacting other turning clubs in southern Cal area to find a used lathe. Stay away from Harbor Freight! A: (Warren Brown) The Delta lathe should also be mentioned. Seth McArthur has one and I use one in Jeff’s shop here in Camarillo. It’s a long bed lathe with the head stock that is moveable (as well as the tail stock) which makes it a short bed bowl lathe. This surely makes it easier on the back when doing hollow forms. It has variable speed control which I think is great after having to change belt positions in step pulleys for many years. It’s worth the extra money and changes our hobby from work to fun. All lathes that are not structural heavyweights must be weighted in some [additional] way to keep them from chasing you around the shop. We built a plywood box shelf between the legs which we filled with sacks of baroid (or other) from oil well supply stores. It’s used as a heavy mud to control pressure from the hole. Battels Hardware and Tool Co. (562) 698-3714 is where we purchased the Delta lathes. They were even on sale (about $2,000) ten years ago. They also have used equipment. Be careful with used stuff. We had one bad experience but several good deals. Battels also had the best prices on other new equipment. Ask for Jack. He may still work there. *** |